
3 Minute Read
Tips for using Premium Billing
Follow these tips for success when using Premium Billing.
Tip #1: Create your Premium Billing account and password
Create a Premium Billing account.
- Click Go to Sign In Page
- Click Create an Account
- Enter your email address and click Email Verification
- You will receive an email with an access code. Type in the access code. You will not be able to cut and paste this code.
Tip #2: Add a payment account
After creating your Premium Billing account, set up a payment account.
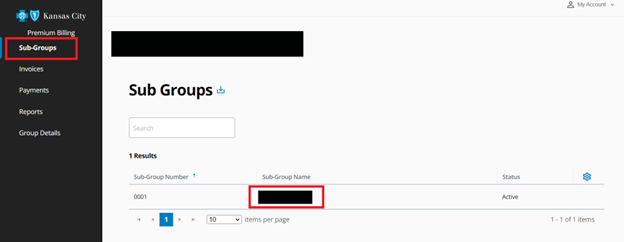
- Go to the Sub-Groups tab in the left navigation and click into the appropriate sub-group located under Sub-Group Name in the middle of the screen.
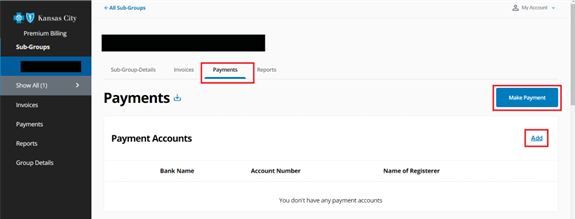
- Click the Payments tab on the horizontal ribbon under your sub-group number and name.
- Click the Add button.
- Fill in the required fields.
- Click Apply and then Add.
How to Setup a Payment Account tutorial.
Tip #3: Set up recurring payments
Never forget a payment when you set up recurring payments. If you had recurring payments set up on the previous billing system you must re-establish it on Premium Billing.
- Go to the Sub-Groups tab in the left navigation and click into the appropriate sub-group located under Sub-Group Name in the middle of the screen.
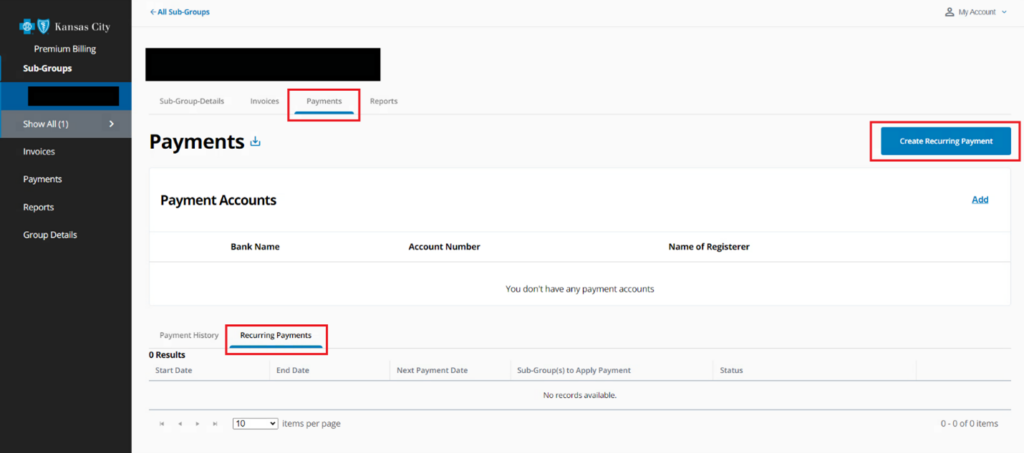
- Click the Payments tab on the horizontal ribbon under your sub-group number and name.
- Click the Recurring Payments sub tab.
- Click the blue Create Recurring Payment button and fill in the required fields.
- Follow these steps for each sub-group that requires recurring payments.
Watch Make a recurring payment tutorial.
Tip #4: Make a one-time payment
Make manual payments each month by following these steps.
- Go to the Sub-Groups tab in the left navigation and click into the appropriate sub-group located under Sub-Group Name in the middle of the screen.
- Click the Payments tab on the horizontal ribbon under your sub-group number and name.
- Click Make Payment button and fill in the required fields.
- Click Make Payment to complete the payment.
Watch Make a one-time payment tutorial.
Tip #5: Solve log-in issues
If you’re having trouble getting logged in after creating your account, try clearing your browser cookies and cache. Here’s a helpful link for Google Chrome users. The steps to do this will differ depending on your internet browser.
Additional Premium Billing resources
Questions about the Premium Billing application?
- Small Groups (less than 50) please call 816-395-2950 to speak with a Customer Advocate.
- Medium Groups (50-100) please contact your Membership Account Specialist.
- Large Groups (100+) please contact your Membership Account Specialist.
Was this helpful?
Thanks for your feedback!